Scheduled / Recurring Invoices

By default, fee invoices are published on a "One-Off" basis. However, while publishing fees you have the option to schedule recurring invoices to be published automatically at a specified interval.
Scheduling a recurring invoice
A recurring invoice may be scheduled while publishing a fee. Click here for details.
Viewing an invoice schedule
You may view an invoice schedule to inspect its attributes such as the admin who scheduled it, the number of times it has been published, etc.
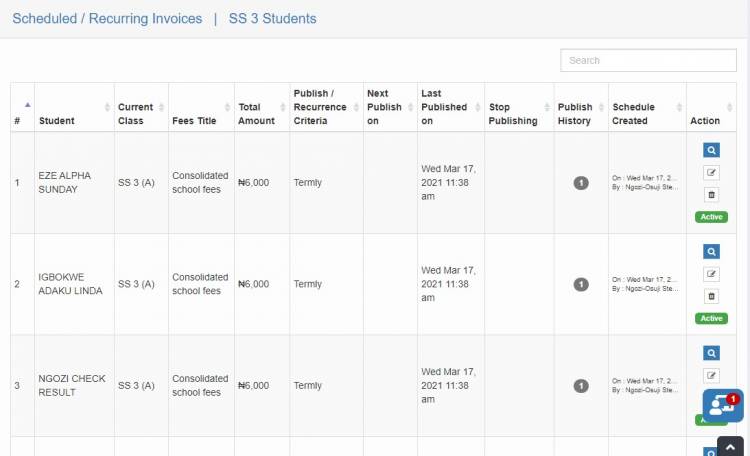
1. Click the Scheduled / Recurring invoices link under the Fees/Bursary menu. A page similar to the snippet below should be loaded.

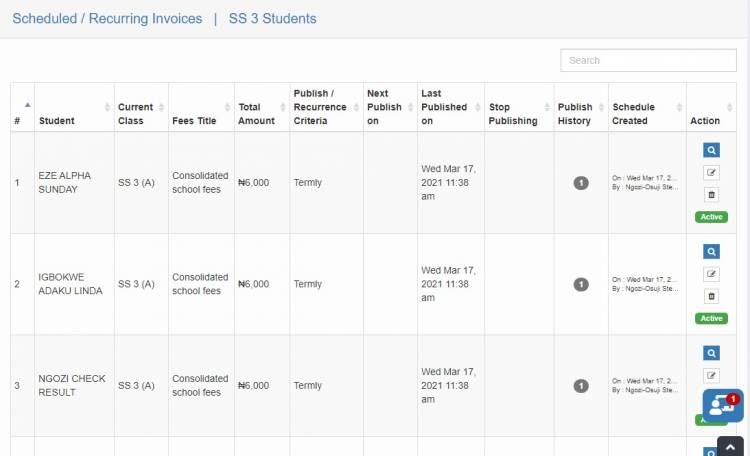
2. Select the class and class arm whose scheduled invoice you wish to view, then click "View Invoice Schedule List". All scheduled invoices (if any) will be loaded as shown below.

3. Click  to view a student's invoice.
Editing an invoice schedule
You may edit an invoice schedule to alter the interval or other attributes such as the associated fee items and part payments options. To get started, Click  on any student's invoice to open the edit modal.
1. To modify the fee items:
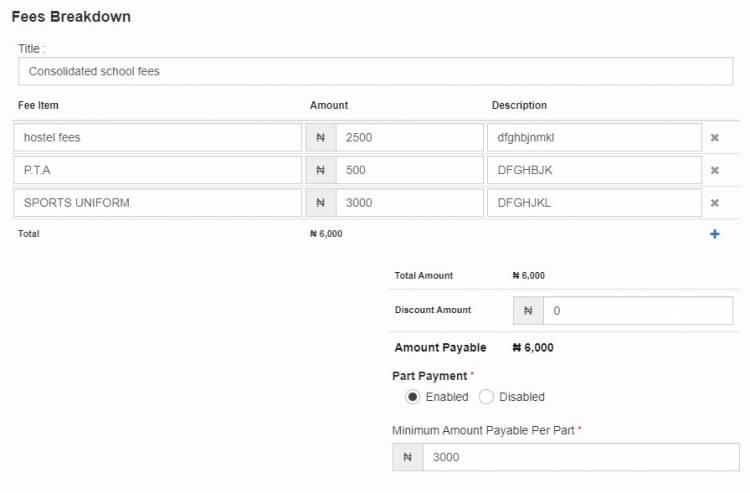
Scroll to the Fees Breakdown section as shown below

- To add, click
 and select the fee item you wish to add.
 - To delete, click
 next to the item you wish to remove and confirm the prompt.
You may also add any discounts by entering the amount in the space provided.
Furthermore, you may also modify the part payment option and the minimum amount per part payment by using the controls provided.
2. To modify the recurring interval:
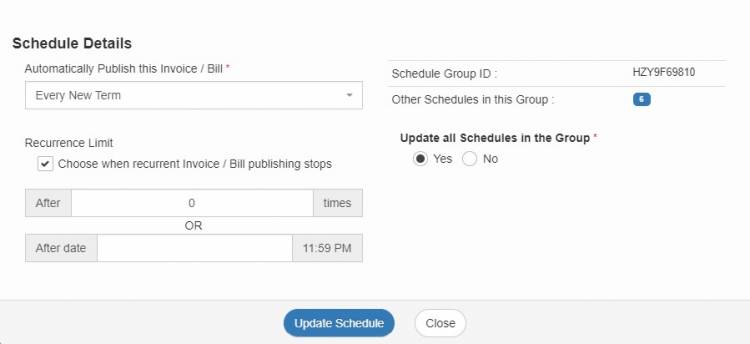
Scroll to the Schedule Details section as shown below

- To alter the interval, under Automatically Publish this Invoice / Bill, use the dropdown menu to choose a new interval.
- To set specify when the auto-publishing stops, click Choose when recurrent Invoice / Bill publishing stops and enter the number of times the invoice should be auto-published or a date after which the auto-publishing should stop.
3. Applying changes to other students in the group:
To propagate the modifications to all students in the group or class, then under Update all Schedules in the Group, select the "Yes" option before saving the changes. Otherwise, select "No" to save the changes for the student whose invoice is being edited.
When you are done and ready to save, click "Update Schedule" to save your changes.

