Fees payment and collection panel

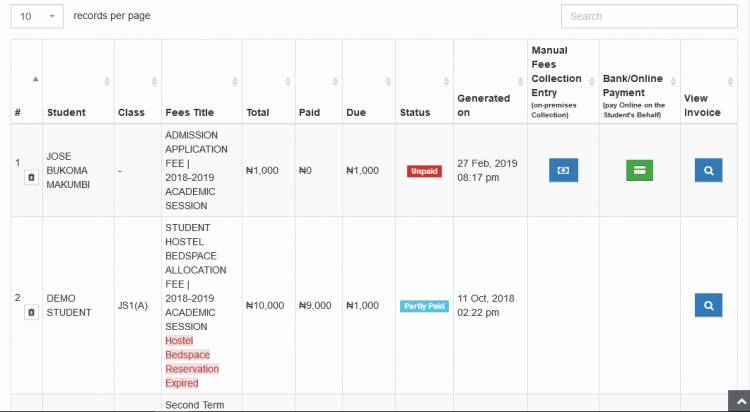
The fees collection panel houses all the invoice for charges generated across the system. It contains invoices for charges such as published school fees, admission fees, hostel fees etc. It allows you to see and sort all payments in three different categories; Unpaid, Paid, Partly Paid.
But most importantly, you can also accept cash payments from students in person and enter the payment yourself into the system.
Viewing published fees and their statuses
To view all the charges,
1. Click the Fees Payment / Collection Panel link under the Fees / Bursary menu. You should see the page in the image below

2. Select the class and academic session options you want to view charges for. Also, you must specify at least one of the filters to use in fetching the records. Choose either Unpaid, Partly Paid or Total Paid, you may also select all of them to view all of the categories.
3. Click  . You should then see the charges according to the filters you selected.
Fees payments summary

You can scroll down to the bottom of the page to see the summary of the invoices. You can see how many of the invoices has been in full, in part or umpaid at all.
Manual (on-premises) fees collection entries
If you are accepting cash payments, you should enter the payments into the system so that it can be recognized. To do that, you should find the charge in the list of charges generated in the Viewing published fees and their statuses section above. You may also use the search box to find the record easily. You may search using any of the payer's details like name, email etc.
2. When you see the charge, click on the  button under the Manual Fees Collection Entry column.
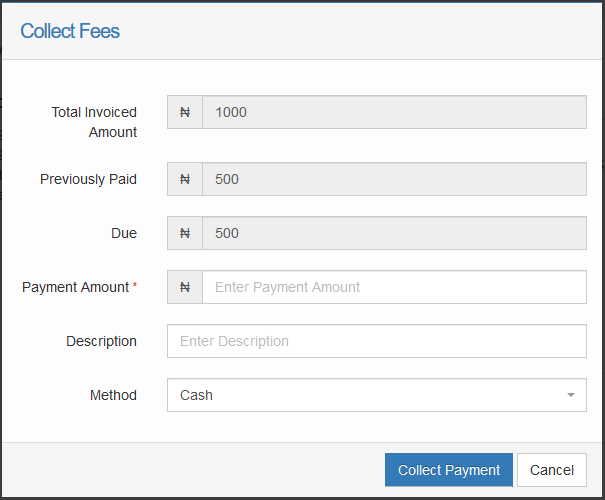
3. Scroll down the page and review the charge, then click  to open the fee collection interface. It is shown below.

4. In the Payment Amount field, Enter the amount you have received from the payer. It may be less than the Total Invoiced Amount if part payments is enabled for the charge. In the case that part payments is supported, any previously paid amount will be shown in the Previously Paid box and the remaining unpaid balance will be shown in the Due box. If part payments is not supported, ensure that the amount you received from the payer is equal to the charge in the Total Invoiced Amount box.
5. Add any descriptions and specify the method of payment (POS, Cash, Cheque).
6. Click  and confirm the prompt.
Online/bank payment
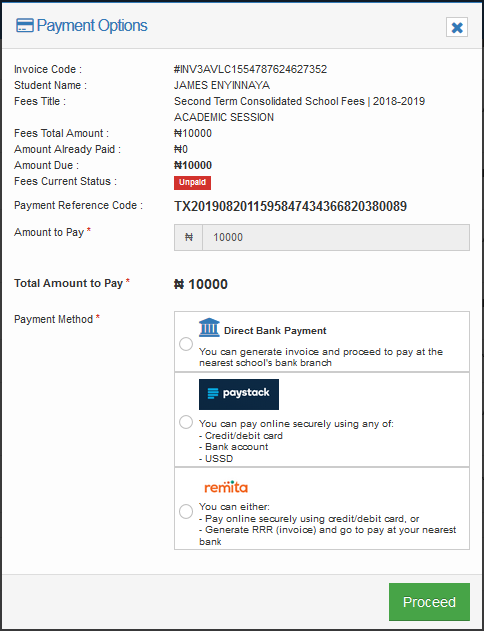
If you would want to make the payment from your account on behalf of the student, you can click the  button under the Bank/Online Payment column. you should then see the page as shown in the image below

2. Select the payment processor to use for the transaction an click  .
.
3a. If you chose Direct Bank Payment option, an invoice will be generated for you with the account details to make the payment to. Proceed to make the payment at the bank. Then after the payment has been confirmed, you must record it into the system using the Manual (on-premises) fees collection entries guide described above.
3b. If you chose any of the electronic payment processors, you would be directed to the processor's checkout page to complete the payment.
Viewing fees invoice
To view an invoice, click on the invoice's  button

