Result Checking
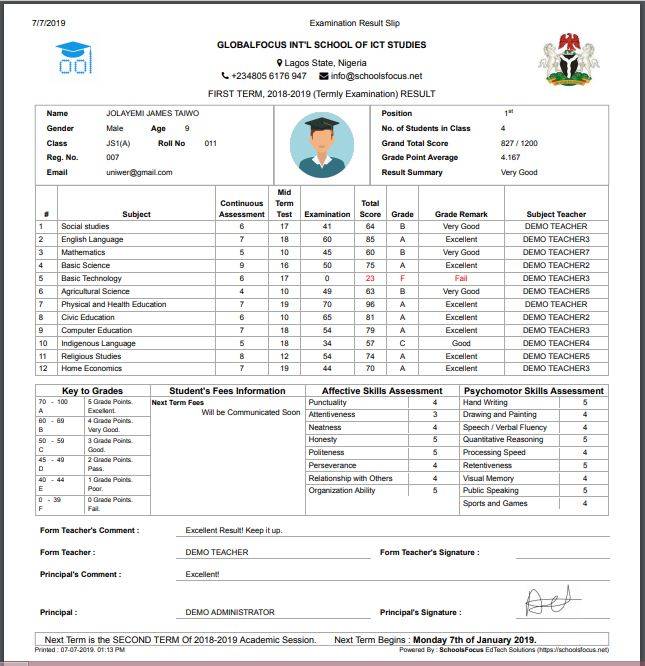
This manual describes the procedure involved in checking results from different account levels.
- The admin account is super user account with no restrictions and can be used to control all aspects of a school’s account with SchoolsFocus and may be used to manage other user accounts for a school.
- The parent account is used by a parent to track the information and progress of his/her wards in the school. The parent can view results, see pending assignments, review pending payments and preview upcoming events like PTA meetings
- The student account allows students to access the portal and allows them to perform any student related actions on the portal
How to check results as a parent
For a parent to view the results of a student, follow the below guideline.
1. Login with your details to access the parent dashboard.
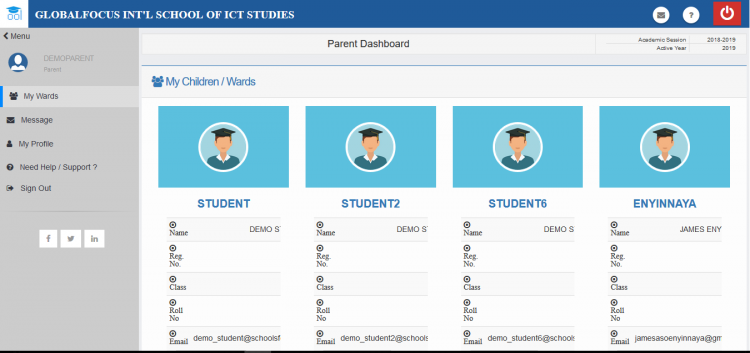
Fig 2.1 – Parent dashboard
You should a list of all your wards on the dashboard. If it’s not visible, click on My Wards in the left menu-bar.
2. Click on the name of the student who’s result you wish to check.
3. Click on Results in the left menu-bar. This will reveal a sub-menu as seen in fig 2.2
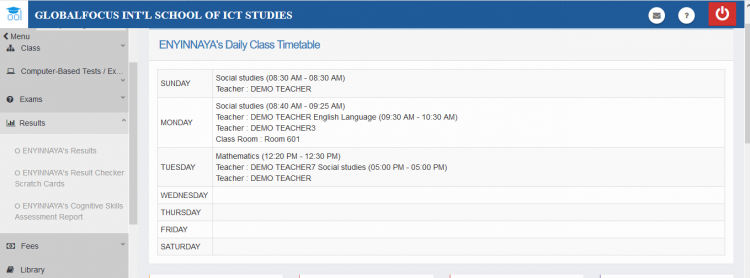
Fig 2.2 – The expanded left menu
4. Click on the link that says your ward/child’s name result. Eg: if your child’s name is Enyinnaya, click on the link that says Enyinnaya’s Results. This will reveal the result checking page as shown in fig2.3
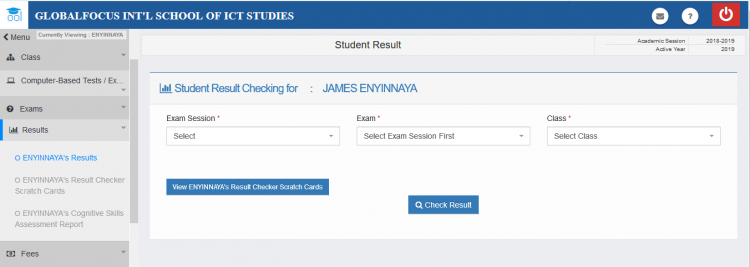
Fig 2.3 –The result checking page
5. In the result checking page, you should enter the following information:
- The Academic session the exam was written
- Type of exam that was written.This is normally the TERM when the exam was written.
- Class of the student when the exam was written.
Then wait for the system to confirm the inputs. If the result has been uploaded, you should see a green confirmation alert and the spaces to enter the result checking pin and serial number.Then proceed to step 6. However, if the result has not been uploaded, you would see a red alert describing the issue. In this case, you should contact the school management and make a complaint.
6. Enter the:
- Scratch card pin: This is a 12-character code which can be found by scratching off the silver panel on the front of the card.
- Serial Number of the card. This is a x-character code which can be found below the PIN.
7. Click on VIEW RESULTS to view the student’s results.
How to check result as a student
To view your results as a student, follow below guidelines.
1. Login with your details to access the dashboard.
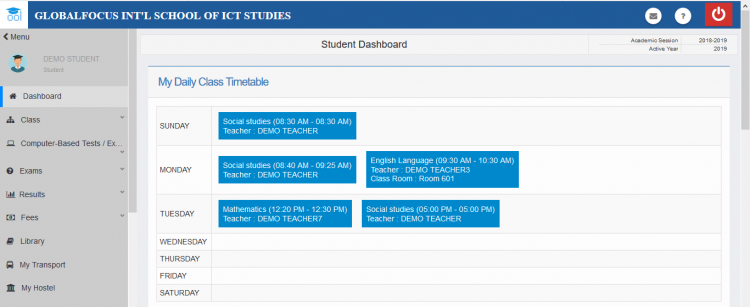
Fig 3.1 - student dashboard
2. Click Results menu link in the sidebar. This will reveal a submenu.
3. Click My Results to open the result checking page.
4. In the result checking page, you should enter the following information:
- The Academic session the exam was written
- Type of exam that was written.This is normally the TERM when the exam was written.
- Class of the student when the exam was written.
Then wait for the system to confirm the inputs. If the result has been uploaded, you should the green confirmation alert and the spaces to enter the result checking pin and serial number. Then proceed to step 5. However, if the result has not been uploaded, you would see a red alert describing the issue. In this case, you should contact the school management and make a complaint.
5. Enter the:
- Scratch card pin: This is a 12-character code which can be found by scratching off the silver panel on the front of the card.
- Serial Number of the card. This is a x-character code which can be found below the PIN.
6. Click on VIEW RESULTS to view the student’s results.
How to check result as an admin
To check results from the admin account, follow the below procedure.
1. Login to the dashboard and click on the Result / Grade Book menu link.
2. Click on Print Student Result to setup the class of the student. You should see fig 1.1.

Fig 1.1 - Form to select the class of a student
3. Select the:
- class of the student who’s result you wish to check
- division / arm of the student.This applies if the classes have sub-divisions like JS1-A and JS1-B.
4. Click VIEW button to generate a list of the students in the class you have selected. You should now see fig 1.2 below fig 1.1. Depending on your screen size, you may have to scroll down to see the list completely.
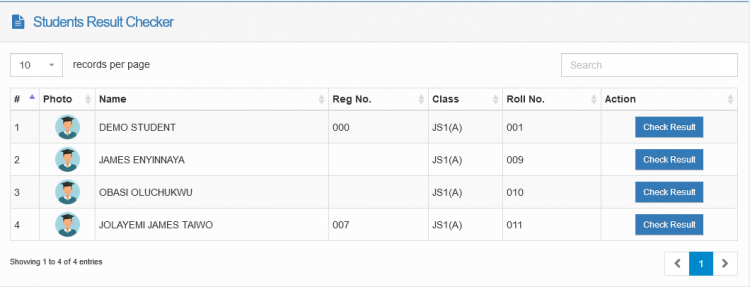
Fig 1.2 - The generated list of students in the selected class
5. Navigate to the name of the student who’s result you wish to check. You may use the search box to search for the name of the student. Click the blue check result link on the row of the student. A new tab should open on your browser, switch to the new tab. You should then see fig 1.3
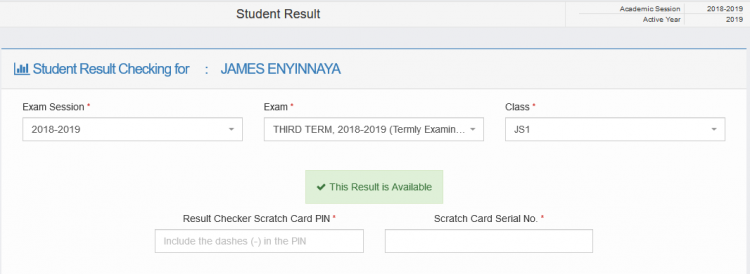
Fig 1.3 – the result checking page
6. Select the:
- Academic session the exam was written
- type of exam that was written. This is normally the TERM when the exam was written.
- Class of the student when the exam was written.
Then wait for the system to confirm the inputs. If the result has been uploaded, you should see a green confirmation alert and the spaces to enter the result checking pin and serial number.Then proceed to step 7. However, if the result has not been uploaded, you would see a red alert describing the issue. In this case, you should ensure the result was uploaded and try again.
7. Enter the:
- Scratch card pin: This is a 12-character code which can be found by scratching off the silver panel on the front of the card.
- Serial Number of the card. This is a x-character code which can be found below the PIN.
8. Click on VIEW RESULTS to view the student’s results.

